How to Upgrade Insulation Jackets on Older Water Heater Tanks
Insulation plays a critical role in the efficient operation of water heater tanks. By minimizing heat loss, proper insulation significantly enhances energy efficiency, which directly impacts energy consumption and utility bills. Water heaters are typically designed to maintain a specific temperature, and any heat loss that occurs makes the system work harder to restore the water to its desired heat level. This increased workload not only elevates energy costs but can also lead to premature wear and tear on the unit.
Heat loss can be a substantial issue, particularly in older water heater tanks that may lack adequate insulation. In fact, studies indicate that without proper insulation, water heaters can lose up to 20% of their heat through the walls. This substantial energy loss translates directly into higher electricity or gas bills, elevating monthly expenses for homeowners. Additionally, with higher energy demands imposed on the water heater, the risk of system failure increases, often leading to costly repairs or replacements.
Moreover, maintaining consistent water temperatures contributes to overall comfort and convenience in the home. When water heaters work efficiently, they provide an uninterrupted supply of hot water, essential for daily activities such as bathing, cooking, and cleaning. Beyond comfort, consistent temperatures can enhance the longevity of the unit itself. Water heaters that are well insulated tend to experience fewer fluctuations in temperature, reducing stress on internal components and prolonging their lifespan. In this way, proper insulation not only contributes to immediate energy savings but also minimizes long-term maintenance and replacement costs, ultimately maximizing return on investment.
Signs Your Water Heater Needs an Insulation Upgrade
As water heaters age, the effectiveness of their insulation jackets can diminish, leading to various performance issues. Notably, the most evident sign that your water heater requires an insulation upgrade is a noticeable increase in your energy bills. When insulation is compromised, the tank loses heat more rapidly, causing the water heater to work harder to maintain the desired temperature. This results in higher energy consumption and expenses.
Another critical indicator of insulation inefficiency is the presence of unusual noises coming from the water heater. Sounds such as popping or rumbling can indicate that sediment has built up at the bottom of the tank, which often occurs in poorly insulated heaters. The increased energy required to heat the water may lead to similar noises, further suggesting that the insulation jacket may not be functioning optimally.
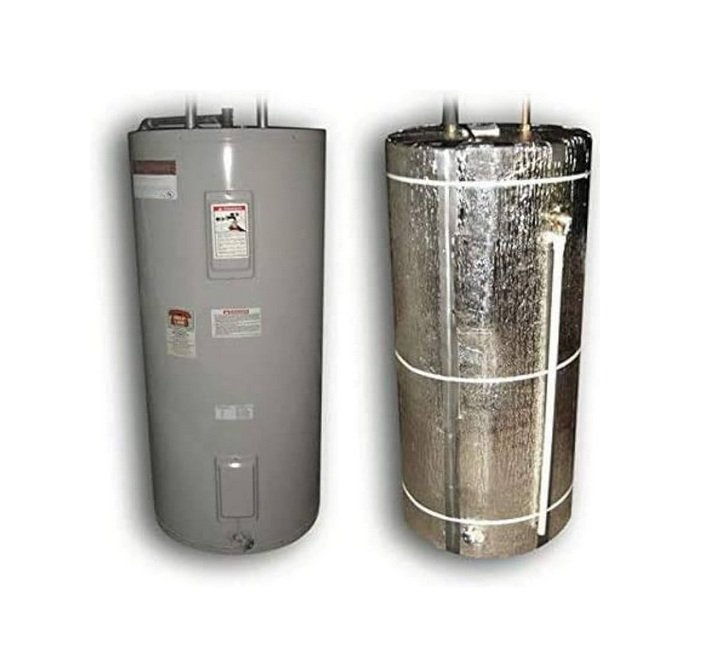
Additionally, fluctuating water temperatures can also signify the need for an insulation upgrade. If you experience inconsistent water heating or find that the water is not reaching the desired temperature, the insulation might be insufficient to retain heat effectively. To diagnose this issue, inspect the insulation jackets for any visible signs of wear, such as rips, tears, or degradation. A well-insulated water heater maintains temperature efficiently, reducing the wear and tear on the unit.
Furthermore, it is wise to consider the age of the water heater itself. Older models, typically over ten years, are more likely to suffer from insulation breakdown. Regular inspection and maintenance checks can help homeowners detect these signs early. By addressing insulation issues promptly, homeowners can improve energy efficiency and ensure a consistent supply of hot water, thus prolonging the lifespan of their water heater.
Choosing the Right Insulation Material for Upgrading
Upgrading the insulation of older water heater tanks is crucial for improving energy efficiency and reducing heat loss. There are several types of insulation materials available, each with distinct advantages and disadvantages that merit consideration.
One of the most common materials is fiberglass insulation. Fiberglass has a notable R-value, typically ranging from R-11 to R-38, depending on its thickness. This material provides excellent thermal resistance and is relatively inexpensive. However, it can be challenging to install properly, necessitating careful handling to avoid irritating skin. Moreover, fiberglass insulation can be affected by moisture, reducing its effectiveness if not adequately protected.
Foam insulation is another viable option, offering higher R-values often exceeding R-5 per inch. It is lightweight, easy to install, and provides superior moisture resistance, making it an excellent choice for areas with high humidity. Despite these advantages, foam insulation tends to be more expensive than fiberglass, and can also pose a fire hazard if not properly covered and maintained.
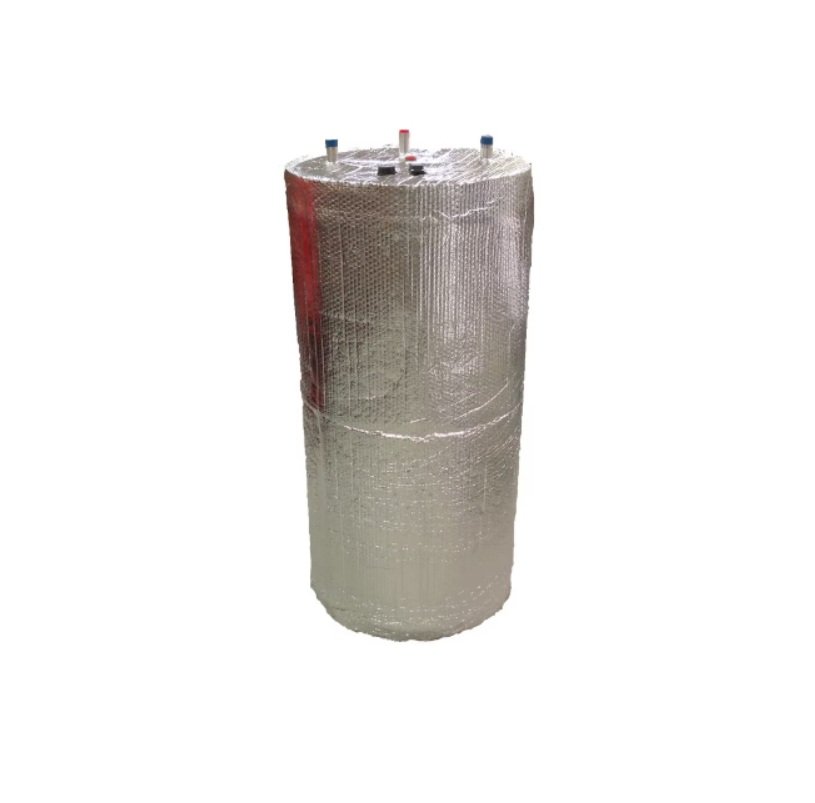
Reflective insulation is another alternative that works best in warmer climates. This material reflects radiant heat rather than absorbing it, which can help to keep a water heater tank cool. The effectiveness of reflective insulation is heavily dependent on its installation; it should be installed with an air gap between the insulation and the heat source to work effectively. Its R-value varies, but it generally performs favorably in conditions requiring temperature moderation.
When choosing the right insulation material, it is essential to factor in the type and age of the water heater tank, as well as local climate conditions. Additionally, consider environmental impacts and safety standards to ensure that your choice not only meets insulation needs but is also sustainable and compliant with safety regulations.
Step-by-Step Guide to Upgrading Insulation Jackets
Upgrading the insulation jackets on older water heater tanks can enhance energy efficiency and reduce heat loss. This step-by-step guide will help you through the process with necessary tools and safety precautions.
Required Tools: To effectively upgrade your water heater tank insulation, gather the following tools: a utility knife, measuring tape, spray adhesive, and a pair of scissors. Additionally, you may require safety goggles and gloves to protect yourself during the procedure.
Safety Precautions: Before starting, ensure the water heater is turned off and all power sources are disconnected. This precaution is vital to avoid electrical hazards during the insulation upgrade. Ventilation is also important; work in a well-ventilated area to minimize inhalation of any fumes from the materials you will be using.
Preparation Steps: Begin by measuring the dimensions of your water heater tank accurately. Measure both the height and circumference to ensure that the insulation jacket fits perfectly. Next, clean the entire surface of the tank to remove dust, grime, or any existing insulation material, as this promotes better adhesion for the new insulation.
Application Instructions: Cut the new insulation jacket materials to fit the dimensions you measured earlier. Apply spray adhesive to the tank surface and attach the insulation, ensuring that it is evenly distributed. Pay particular attention to the joints and seams; these areas are critical for preventing heat loss. Use tape or additional adhesive to secure the insulation jacket in place.
Common Mistakes to Avoid: One common mistake is not layering the insulation properly, leading to gaps that can affect performance. Also, be cautious not to over-compress the insulation material, as this can reduce its effectiveness. Always double-check your measurements before cutting to avoid wastage.
Final Checks: After the installation is complete, reconnect any power supplies carefully. Perform a visual inspection to ensure that the insulation is correctly fitted and there are no exposed areas. If you remain uncertain about the installation, consider consulting a professional for further assistance.