How to Safely Replace Old Water Heater Wiring Insulation
Wiring insulation plays a crucial role in the functionality and safety of water heaters. This insulation surrounds the electrical wires, serving as both a protective barrier and a means to prevent electrical hazards. When in good condition, insulation ensures that electrical currents flow smoothly without interference, thereby enhancing the appliance’s efficiency.
However, old or deteriorating insulation can lead to serious safety concerns, including electrical shorts, which occur when the insulation has failed and allows two conductive materials to come into contact. Such incidents can not only damage the water heater but also pose a significant fire hazard. Moreover, compromised insulation can result in increased energy costs, as the water heater works harder to maintain temperature due to inefficiencies created by damaged wiring.
Common types of materials used in water heater wiring insulation include PVC, rubber, and thermoplastic elastomers. Each material has its own set of advantages, such as resistance to heat, moisture, and chemicals, making them suitable for environments that are subjected to high temperatures and variations in humidity. It is essential to choose insulation that meets the specific requirements of the water heater to maintain optimal performance.
Homeowners should remain vigilant about the condition of water heater wiring insulation. Key signs that indicate a need for immediate replacement include visible wear or fraying, exposed wires, or an unusual increase in energy bills. Addressing these issues proactively can prevent potential hazards, extend the lifespan of the water heater, and ensure that the household remains safe from electrical incidents.
Preparing for the Replacement Process
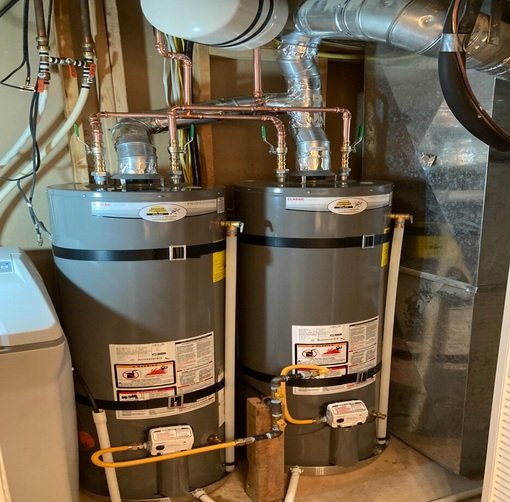
Replacing old water heater wiring insulation is a vital task that assures both efficiency and safety. Prior to commencing the replacement process, several crucial preparatory steps must be taken. First and foremost, gather the necessary tools and materials required for the job. Essential items typically include wire strippers, heat-resistant insulation, electrical tape, and safety goggles. Collecting all tools before starting the replacement will help streamline the process and ensure that the task can be completed without unnecessary interruptions.
Safety is paramount during this process. Before handling any wiring, ensure that the power to the water heater is turned off at the breaker box. This is a critical step to prevent electrical shocks or potential injuries. Additionally, it is advisable to drain the water heater completely. This not only alleviates the risk of water spills but also makes it easier to access the wiring without obstruction from residual water. Familiarizing oneself with the specific model of the water heater can also aid in identifying the exact insulation type that is needed for a successful replacement.
Creating a checklist of preparatory measures before initiating the replacement process is highly beneficial. The checklist should include turning off power, draining the water heater, gathering all necessary materials, and reviewing safety precautions. Moreover, consider wearing protective equipment such as gloves and goggles throughout the entire process. These precautions will minimize risks and ensure that the replacement can be conducted efficiently. Proper preparation ultimately contributes to a successful and safe replacement of the old water heater wiring insulation.
Step-by-Step Guide to Replacing Water Heater Wiring Insulation
Replacing the wiring insulation for a water heater is an important task, ensuring both safety and efficiency. Begin by ensuring your safety: turn off the electrical supply to the water heater at the main circuit breaker. This initial step is crucial to prevent electric shock or accidents during the insulation replacement process.
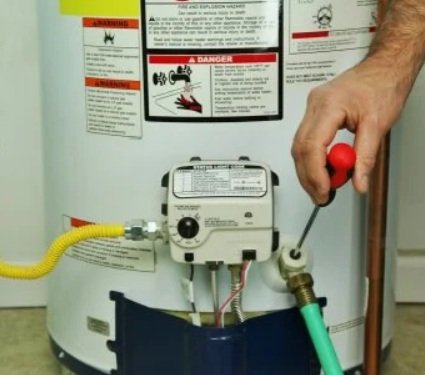
Next, carefully remove the access panel on your water heater. This panel typically houses the electrical components that require insulation. Once the panel is removed, gently disconnect existing wiring connections, taking care to note their positions for reassembly. Using a multimeter, double-check that there is no electrical current present before proceeding to remove the old insulation.
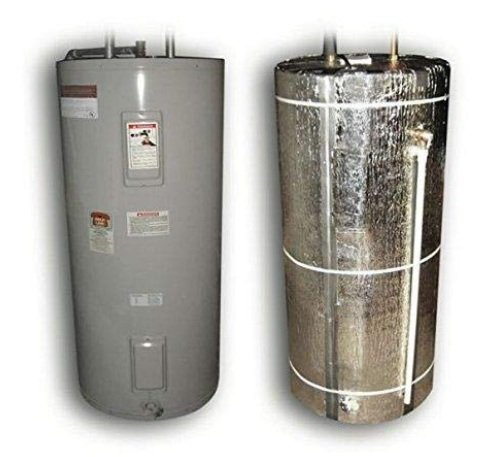
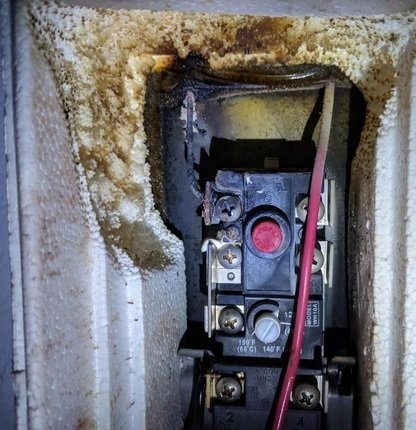
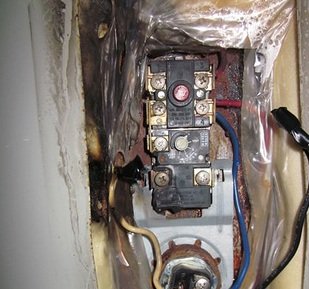
With the old insulation dismantled, assess the condition of the wiring. If the wiring shows any signs of damage or wear, it is advisable to replace it entirely to ensure a safe and reliable operation. If the wiring is in good condition, proceed to insulate the new wiring. Utilize high-quality, heat-resistant insulation material specifically designed for electrical applications. These materials provide protection against heat and moisture, essential for a water heater’s environment.
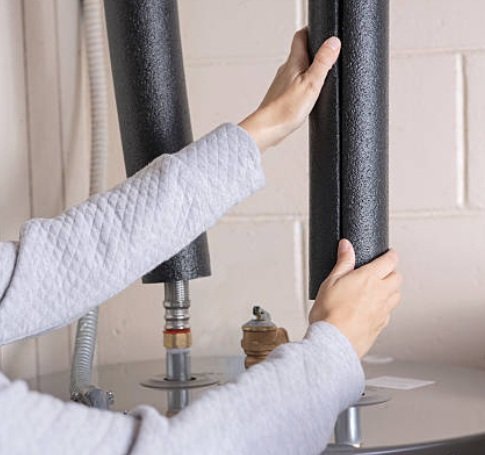
Cover the newly installed wiring with the insulation, ensuring a snug fit without any gaps. This step is essential for maintaining efficiency and safety, as inadequate insulation could lead to overheating or energy loss. Secure the insulation with electrical tape to provide additional stability.
Once the insulation is firmly in place, reconnect the wiring to the terminals on the water heater. Make sure that the connections are solid and free from any exposed wires. Finally, replace the access panel and restore power to the unit. Perform a test to ensure the water heater operates correctly and monitor it regularly for any signs of issues in the insulation or connections.
Post-Replacement Tips and Maintenance
Once the insulation of the water heater wiring has been successfully replaced, it becomes essential to adopt a series of maintenance and inspection practices to ensure the longevity and efficiency of the insulation materials. Initial safety tests should be conducted to confirm the integrity of the installation. One of the primary methods involves checking for any signs of moisture or damage around the wiring. This is critical, as compromised insulation can lead to more severe issues, such as electrical shorts or leaks.
It is advisable to perform visual inspections periodically to detect any deterioration in the insulation. Look for fraying, discoloration, or any signs of wear and tear that might suggest the insulation has begun to degrade. Additionally, pay attention to any unusual smells, sounds, or consistent spikes in energy bills, as these could be indicators of underlying problems.
Regular maintenance practices should include cleaning the surrounding area of the water heater to prevent dust accumulation, which can impact both insulation and overall appliance performance. Keeping the heater free from obstructions will allow for ideal airflow, contributing to its efficiency.
Furthermore, consider establishing a routine of checking the wiring insulation every six months or so. This proactive approach will enable you to catch potential issues early, minimizing the risk of more extensive damage and the associated costs. If, during your assessments, you notice persistent problems or do not feel confident in addressing certain issues, it is prudent to consult a professional. An experienced technician can provide a comprehensive evaluation and address any concerns regarding the insulation or wiring, ensuring the safety and functionality of your water heater system.