How to Safely Flush Your Water Heater by Yourself
Flushing your water heater is a critical maintenance task that cannot be overlooked if you want to ensure optimal performance and longevity of the unit. Over time, sediments, minerals, and rust can accumulate in the tank due to regular use and the heating process. This buildup can potentially impact both water quality and the efficiency of the heater, leading to a range of problems.
One of the primary issues caused by sediment accumulation is reduced heating efficiency. As sediments gather at the bottom of the tank, they act as an insulating layer, making it more difficult for the heating element to warm the water effectively. Consequently, the heater has to work harder and longer to achieve the desired water temperature, which can ultimately lead to higher energy costs and increased wear on the unit.
Moreover, sediment buildup can adversely affect the quality of water being heated, leading to unpleasant tastes or odors. In some cases, this sediment can also result in discolored water, which is unappealing and may indicate deeper issues with your plumbing system.
Regularly flushing your water heater not only addresses these concerns but also helps in prolonging the lifespan of the appliance. By removing the accumulated sediment, you are allowing the heater to function more efficiently, which can prevent costly repairs or even the need for a replacement. Routine maintenance, including flushing, can also enhance overall heating performance, providing consistent hot water when needed.This proactive measure plays a pivotal role in ensuring that your water heater remains in optimal working condition.
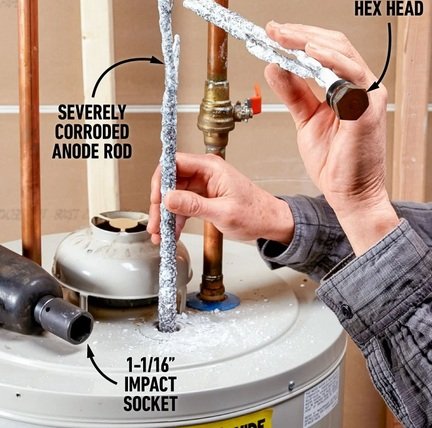
Preparing for the Flush: Tools and Safety Precautions
Flushing your water heater is an essential maintenance task that can extend the life of the system and improve efficiency. The process requires specific tools along with adequate safety precautions to ensure a smooth and secure operation. To start, gather the necessary tools, which typically include a garden hose, a flathead screwdriver, and a bucket.
The garden hose is vital for draining the water heater, as it allows you to direct the expelled water to a suitable drainage area. The flathead screwdriver might be used to open the drain valve where the water will flow out. Additionally, having a bucket on hand can prove beneficial for collecting any residual water that may not fully drain via the hose.
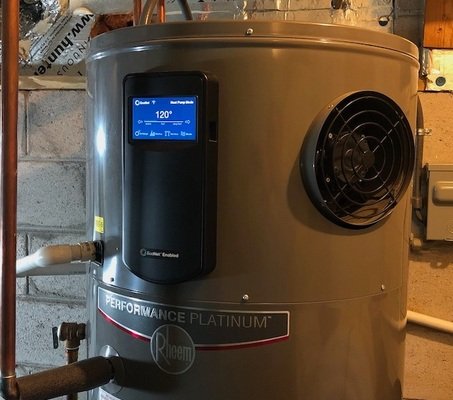
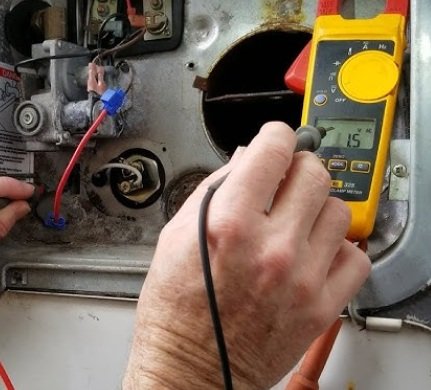
Before proceeding, safety must be your top priority. First, you should turn off the power supply if you have an electric water heater, or shut off the gas supply for gas heaters to eliminate any risk of overheating or accidents during the flushing process. Following this, it is crucial to check the water temperature within the heater. Allow the water to cool down to a safe temperature, typically below 120 degrees Fahrenheit, to prevent scalding.
Moreover, wearing protective gear such as gloves and safety goggles is advisable. Gloves will protect your hands from hot surfaces or any potential chemicals, while goggles will safeguard your eyes from splashes or debris during the flush. Ensuring that you have a clean and clear workspace will further add to your safety as you undertake this task.
By preparing thoroughly with the right tools and adhering to these safety precautions, you can confidently flush your water heater, promoting its longevity and optimal performance.
Step-by-Step Guide to Flushing Your Water Heater
Flushing your water heater is an essential maintenance task that ensures it operates efficiently. Here is a comprehensive guide to help you through the process safely.
First, ensure your safety by disconnecting the power supply. For electric water heaters, turn off the circuit breaker. If your heater operates on gas, turn the thermostat to the “pilot” setting. Next, it is crucial to allow the water heater to cool for several hours to prevent burns. To initiate the flushing process, locate the cold water inlet valve at the top of the tank and close it. This step will stop any new water from entering the heater.
Now, take a standard garden hose and connect it to the drain valve located at the bottom of the heater. Position the other end of the hose in a nearby floor drain or outside, ensuring the path is clear for the draining process. Open the drain valve slowly to empty the tank, being cautious of hot water. Allow the tank to drain completely, which may take several minutes.
Once the tank is emptied, it is time to flush out any accumulated sediment. To do this, briefly turn on the cold water inlet valve to stir up the remaining sediment at the bottom of the tank. This action helps to dislodge buildup. Let this flushing water run for a few minutes until you see clear water coming out of the drain hose.
After flushing, close the drain valve and remove the garden hose. Now, you can refill the water heater by turning on the cold water inlet valve. Make sure to leave the hot water taps open in your home to allow air to escape as the tank fills up. Once the tank is full and you see a steady stream of water from the taps, you can close them.
Finally, restore the power or gas supply to your water heater. For electric heaters, turn the circuit breaker back on, and for gas heaters, switch the thermostat back to the “on” position. Check for any leaks around the drain valve and connections after the refilling process is complete. Proper routine maintenance, including flushing your water heater, can significantly enhance its lifespan and efficiency.
Maintaining Your Water Heater: Best Practices
Proper maintenance of your water heater is essential for ensuring its efficiency and longevity. After completing the flushing process, it is crucial to implement a regular maintenance routine. One of the best practices is to flush your water heater at least once a year. This annual service helps remove accumulated sediment, which can hinder the efficiency of the unit. If you have hard water in your area, consider increasing the frequency to every six months.
In addition to regular flushing, be vigilant about monitoring your water heater for signs that it may need attention. Common indicators include unusual sounds, such as popping or rumbling noises, which may suggest sediment buildup. Another sign to watch for is the presence of rust or leaks around the unit. These issues can lead to significant damage if not addressed promptly. If you notice a decrease in hot water supply or fluctuating temperatures, this may also signal that your water heater requires maintenance.
Other maintenance practices include checking the temperature setting on your thermostat to ensure it is not set too high, which can contribute to energy inefficiency. The ideal temperature range is typically between 120 to 140 degrees Fahrenheit. Additionally, inspect the pressure relief valve periodically to ensure it functions correctly; this valve is vital for preventing excess pressure buildup within the tank.
Finally, consider insulating your water heater and the first few feet of hot water pipes to minimize heat loss. This simple step can lead to significant energy savings. By adhering to these best practices for water heater maintenance, homeowners can maximize the performance of their units and prolong their operational lifespan, ensuring a consistent supply of hot water for everyday needs.